Setting up full NVMe/TCP BFS with QEMU
How does it work:
We need to create a target VM image, it will contain the RHEL root filesystem and will be exported
by a nvme/tcp target instance on a remote machine
On the local machine we will execute the UEFI firmware with QEMU, the firmware will connect to
the remote target, load the kernel and the latter will take over the boot process by using the
information provided by the UEFI firmware via the NBFT table.
         Local Machine                                              Remote Machine

       ------------------                                      -----------------------

       |                |                                      |                     |

       |   QEMU + UEFI  |                                      |   NVMe/TCP target   |

       |   + EFIDISK    |      -------> LAN --------->         |     RHEL rootfs     |

       |                |                                      |                     |

       ------------------                                      -----------------------
Prepare the target RHEL9.2 VM image:
Install a RHEL9.2 VM that we will use as a target:
$ qemu-system-x86_64 --enable-kvm -bios OVMF-pure-efi.fd -drive file=rhel9disk_target,if=none,id=NVME1

	-device nvme,drive=NVME1,serial=nvme-1,physical_block_size=4096,logical_block_size=4096 -cpu host
-net user -net nic
	-cdrom rhel9.2.iso -boot d -m 8G
WARNING: remember to set the disk's logical and physical block size to 4096 bytes.
You can download the OVMF-pure-efi bios image here
Boot the newly installed VM and read the grub.cfg file:
# cat /boot/efi/EFI/redhat/grub.cfg
search --no-floppy --fs-uuid --set=dev 877ea44d-0b8b-4abd-b777-9294757abfd0 <---
set prefix=($dev)/grub2
Copy the device's UUID, we will need it later
Download the RHEL9.2 kernel with the timberland patches and install it on the VM.
Download the timberland dracut RPM packages and install them.
Download the timberland libnvme RPM packages and install them.
Download the timberland nvme-cli RPM and install it.
Copy the hostnqn and hostid, we will need them later:
# cat /etc/nvme/hostnqn

	# cat /etc/nvme/hostid
Note: on QEMU VMs sometimes the hostnqn has an invalid UUID
example: nqn.2014-08.org.nvmexpress:uuid:0000000-0000-0000-0000-000000000000
if this happens, you can generate a valid UUID using the uuidgen command and
replace the content of the /etc/nvme/hostnqn file.
This issue is likely due to a defect in the libnvme library that I will investigate soon.
Select the timberland's kernel as the default kernel and reboot the VM:
# grubby --set-default /boot/vmlinuz-5.14.0-206_nbft4.el9.x86_64

	# reboot
Update the system's initrd and install the nvmf dracut module.
# dracut -f -v --add nvmf
The VM image is now ready and you can shutdown it.
------------------------------------------------------
Create a NVMe/TCP target on the remote machine:
Install the nvmetcli utility:
# dnf install nvmetcli

	# nvmetcli
Create a host entry using the VM's NQN:
/> hosts/ create nqn=nqn.2014-08.org.nvmexpress:uuid:f687aaae-016f-4268-9fc3-5d8220e5a23b
Create a port entry for the target:
/> ports/ create portid=1

	/> cd ports/1/

	/ports/1> set addr adrfam=ipv4 traddr=10.37.153.132 trtype=tcp trsvcid=4420

	/ports/1> cd /
Create the subsystem:
/> subsystems/ create nqn=nqn.2014-08.org.nvmexpress:uuid:4793044c-27c2-11b2-a85c-ec74d87fa65f
Add the ACL entry of the host:
/> cd subsystems/nqn.2014-08.org.nvmexpress:uuid:4793044c-27c2-11b2-a85c-ec74d87fa65f/

	/subsystems/n...-ec74d87fa65f> allowed_hosts/ create nqn.2014-08.org.nvmexpress:uuid:f687aaae-016f-4268-9fc3-5d8220e5a23b
Create a namespace, add the VM disk and enable it:
/subsystems/n...-ec74d87fa65f> namespaces/ create nsid=1

	/subsystems/n...-ec74d87fa65f> cd namespaces/1

	/subsystems/n.../namespaces/1> set device path=/home/rhel9disk_target

	/subsystems/n.../namespaces/1> enable
Link the subsystem to the port:
/subsystems/n.../namespaces/1> cd /ports/1/

	/ports/1> subsystems/ create nqn.2014-08.org.nvmexpress:uuid:4793044c-27c2-11b2-a85c-ec74d87fa65f
------------------------------------------------------
Run the QEMU VM on the local machine:
On the local machine, download and mount the efidisk image:
# tar xvf efidisk.tar.bz2

	# mount -t vfat -o loop,offset=1048576 efidisk /mnt/efidisk
Fix the /mnt/efidisk/EFI/redhat/grub.cfg file in the efidisk image, use the device UUID you copied before.
Open the /mnt/efidisk/EFI/BOOT/config file that contains the parameters used by the UEFI firmware
to connect to the NVMe/TCP target.
The config file has the following format:
 # cat config

	HostNqn:nqn.2014-08.org.nvmexpress:uuid:f687aaae-016f-4268-9fc3-5d8220e5a23b

	HostId:1acb7b81-0194-48f4-8794-587472b60bd2

	$Start

	AttemptName:Attempt1

	MacString:52:54:00:12:34:56

	TargetPort:4420

	Enabled:1

	InitiatorInfoFromDhcp:TRUE

	IpMode:0

	TargetIp:10.37.153.132

	NQN:nqn.2014-08.org.nvmexpress:uuid:4793044c-27c2-11b2-a85c-ec74d87fa65f

	ConnectTimeout:600

	DnsMode:FALSE

	$End
HostNqn is the VM's NQN.
HostId is the VM's hostid.
TargetPort is the target's TCP port.
InitiatorInfoFromDhcp:TRUE means that the DHCP mode is active.
TargetIp is the target's IP address.
NQN: is the target's NQN.
Change the config file according to your configuration.
If your setup needs a static IP address, you can find a config file example
here
Note: the VM must be able to estabilish a tcp/ip connection to the target, you might need to set up
a bridged network device if the target is on the same subnet of the VM.
Example
Unmount the efidisk file
# umount /mnt/efidisk
Download the UEFI firmware files (OVMF_CODE.fd and OVMF_VARS.fd files).
Run the qemu virtual machine:
qemu-system-x86_64 --enable-kvm -drive if=pflash,format=raw,readonly=on,file=OVMF_CODE.fd

	-drive if=pflash,format=raw,file=OVMF_VARS.fd -drive file=efidisk,if=none,id=NVME1 -device nvme,drive=NVME1,serial=nvme-1

	-netdev type=user,id=host0 -device virtio-net-pci,netdev=host0,romfile= -m 8G -cpu host
Note: the romfile= option is needed to avoid a known bug in the timberland's UEFI firmware.
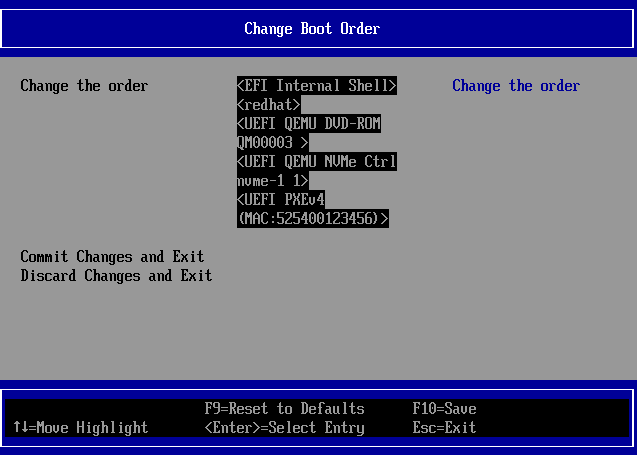
Press immediately the ESC button to enter the UEFI setup menu and change the
device boot order so the EFI Internal Shell will start first, then reboot the VM:
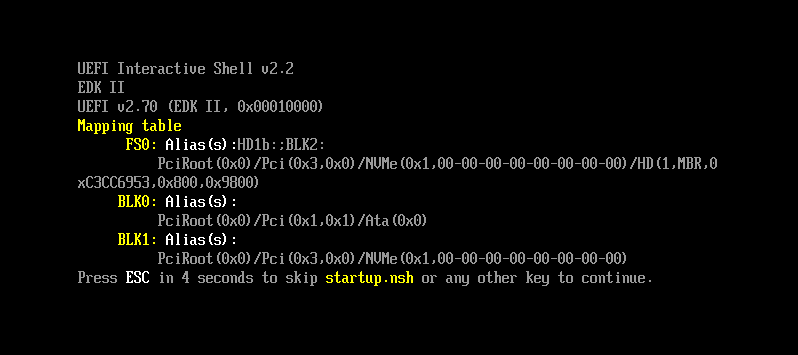
The UEFI Shell will execute the startup script, let the countdown expire.
The firmware will now try to connect to the target, the process may take a few seconds.
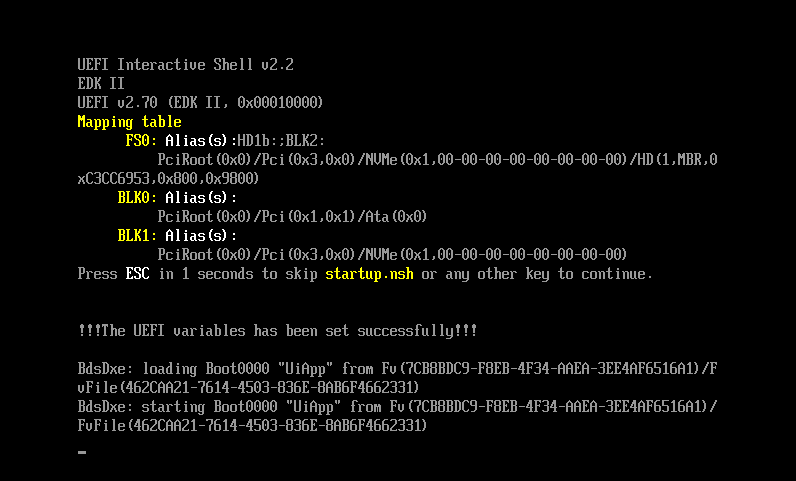
The UEFI boot menu will now appear, open the "Boot Manager" and select the "redhat" entry.
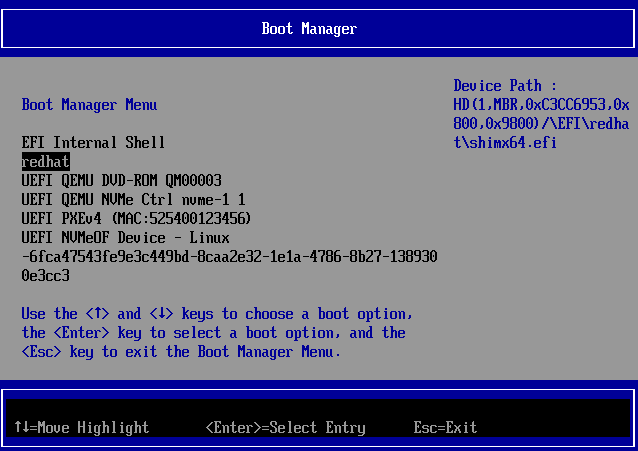
If the connection to the target was successfull, the firmware should be able to
load the GRUB bootloader and execute it; loading the kernel may require several seconds:
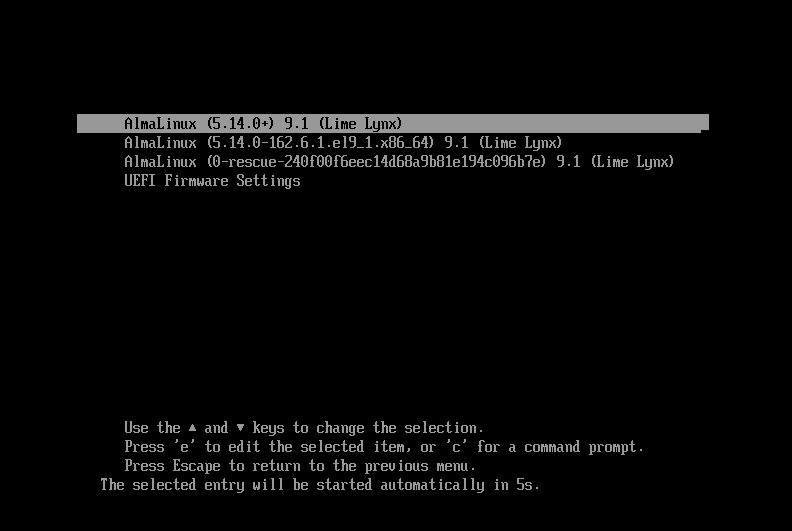
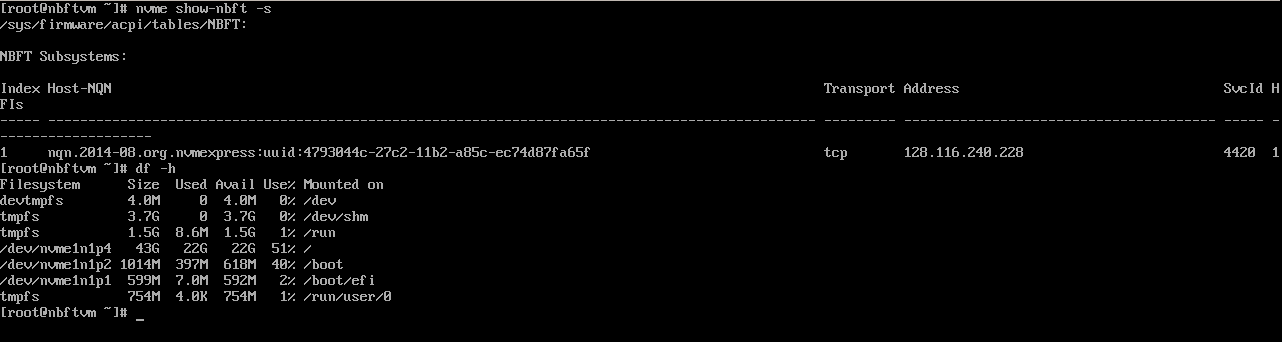
The system boots, the "nvme" utility reads the NBFT table and performs the connection
to the target, the kernel then mounts the remote device as the root filesystem: